Touch Typer: Advanced

Regardless the fact that Touch Typer has a very simple interface, it provides the user with the great degree of flexibility. In this tutorial we will show, how to create a support for a new language, in case it is not included with the program.
This tutorial can also be used, if you want to alter images that are shipped with the program, or want to change a keyboard layout (for example, you prefer not to use a particular finger due to a trauma).
For this example we are going to create a Russian language support, using English one as a starting point.
Note: the program is protected by the (C) and cannot be redistributed, both in modified and in unchanged form.
An image file
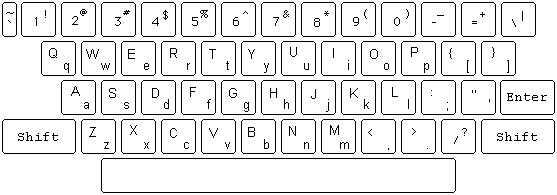
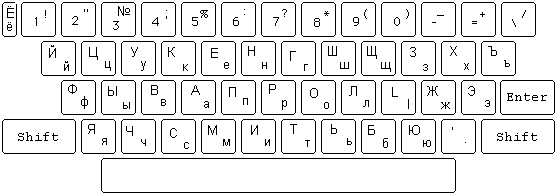
First of all, we need to create a .GIF file, that Typer will use to display the keyboard. Let's take the english.gif, that ships with the program, and edit it (for example, with Microsoft Piant, that is part of Windows):
English:

Russian (after the editing is complete):

Note, that the name of the image file should match names of few other files we are about to create (except for the file extention).
Hands
The program ships with left.gif and right.gif, containing icons for left and right hands. You only need to edit these files if you dislike the original images. If you use the same images, skip this chapret.
If you do it, you will also have to edit the hands.pos file. It contains 10 lines (one per finger), each line containing X and Y coordinates, in pixels, of the tip of the finger (this is the point, that becomes the center of a little circle, that Typer draws to show you, which finger to use).
5,19
13,11
25,8
38,12
48,33
5,33
15,12
28,8
40,11
50,19
To find out, what the coordinates are, load the image in the Paint program, and move the mouse cursor over the image.
Keyboard layout
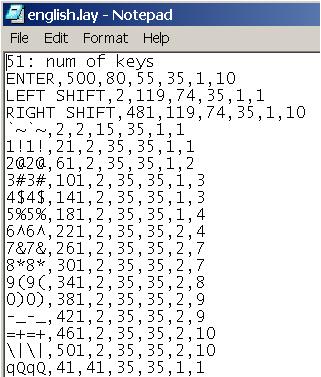
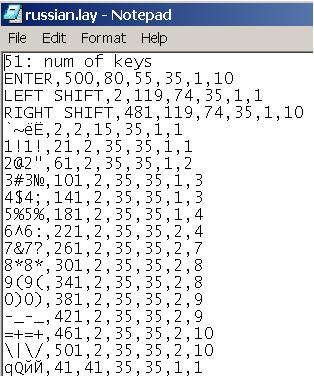
Next, we need to create the russian.lay file, using english.lay as a starting point. Each character is described by one line, containing the following information: small and capital english character, small and capital character for the current language (in our case - Russian), left and top coordinates of the button (in russian.gif), width and height of the button, 0 for lowercase and 1 for a capital character, and the number of a finger. Fingers are enumerated left to right, left baby finger is 1, left ring finger is 2, ... right thumb is 6, ... right baby finger is 10.
51: num of keys
ENTER,500,80,55,35,1,10
LEFT SHIFT,2,119,74,35,1,1
RIGHT SHIFT,481,119,74,35,1,10
`~`~,2,2,15,35,1,1
1!1!,21,2,35,35,1,1
...
Note, that the first 3 lines are reserved for ENTER, left and right shift.
Below are images (screenshots) for the beginning of english.lay and russian.lay files.


Important: you need to save the layout file as UNICODE, not as an ASCII text. to do it, open the file in Windows Notepad, select Save As, and in the "Save As Type", select Unicode.
Text files
Finally, we need some text to practice typing. You can use any text (except for texts that contain special symbols, that are missing in our keyboard, and texts that use more than one language).
Create the text as an RTF file in Windows Wordpad editor. When it is done, copy and paste an exact (up to the last character) copy of this file to Windows Notepad, and save it as UNICODE. As the result, you will get both RTF and TEXT files.
If you do everything right, you will see a new language in the "Select language" dialog.